Setting up the initial connection:
After installing the SAP HANA Client Software, please do the following:
1. Connect to the VPN via the Cisco AnyConnect program. Two-factor authentication will be required to log on. The following Purdue VPNs will allow access:
- webvpn.purdue.edu
- webvpn2.purdue.edu
- zonevpn.itap.purdue.edu/sapbpr
2. Once connected to the VPN, open Excel.
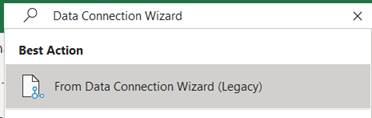
- For Office 365, using the search feature at the top of the spreadsheet, search for ‘Data Connection Wizard’. Select “From Data Connection Wizard (Legacy)” from the search result.

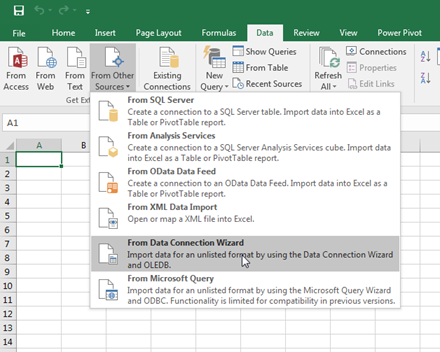
- For other versions of Excel (2007, 2010, 2013 or 2016), on the Data tab in the Ribbon, click “From Other Sources”. In the drop down menu that appears, click “From Data Connection Wizard”.
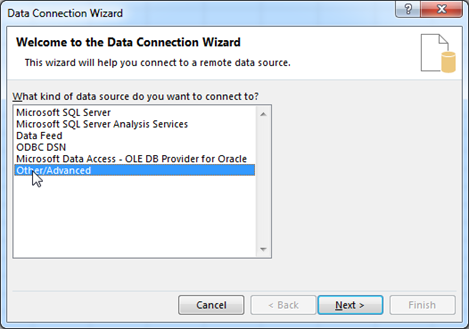
3. In the Data Connection Wizard, choose “Other/Advanced” and click Next.
4. In the Data Link Properties window, on the Provider tab, choose “SAP HANA MDX Provider” and click Next. Note: if you do not see this option, the Excel for HANA add-on was not properly installed on your machine. Check with your local IT department for help with installation.

5. Complete the fields on the Connection tab with the information below. Note that you do not need to fill in the User and Password fields unless instructed. Copy and paste the URL below into the Host field and complete the other fields as pictured.
pubip1.epilabs.purdue.edu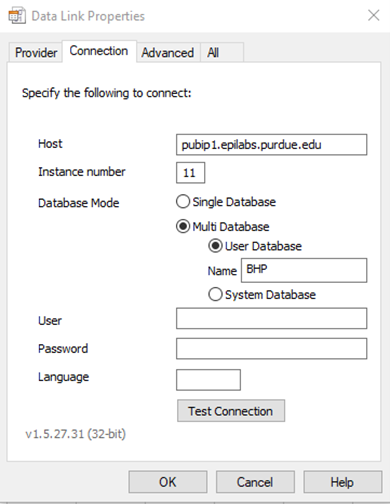
Click the “Test Connection” button. If the popup that appears says “Test Connection Succeeded”, you may click OK to proceed to the next step. If you get any other message after clicking “Test Connection”, please contact the Treasury
Reporting team at treasreporting@purdue.edu for assistance.
NOTE: If you are a Regional user (and have not previously created a successful connection), your account will require additional setup. Please contact treasreporting@purdue.edu for assistance.
- In the Select Database window that appears, ensure that the SFA_SIMPLIFIED_DATASET is selected and click Next.
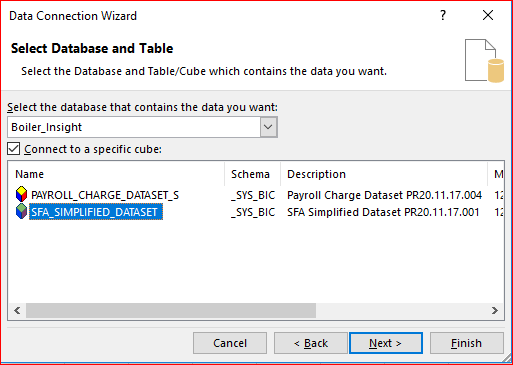
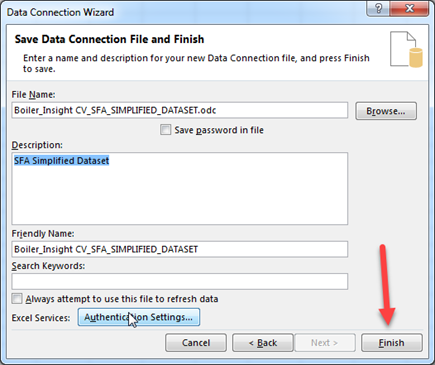
- On the next screen, click Finish.
- In the Import Data window, ensure that PivotTable Report is selected and click OK.

Congratulations! You now have an active connection to the SFA Simplified Dataset.
To reconnect after setting up the initial connection:
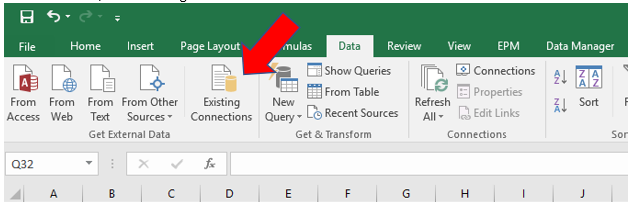
On the Data tab, click “Existing Connections”.
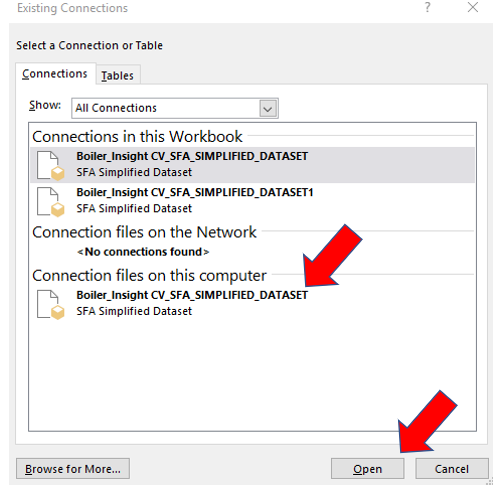
Select the SFA Simplified Dataset from the list of available connections and click Open.
Choose where you would like your Pivot to be located (Existing or New worksheet) and click OK.
Still need help? Click the 'Purdue IT Request' button to start a ticket.